Showing posts with label Easy. Show all posts

Monday, July 4, 2011

Pulled Pork, BBQ Sauce and BBQ Portobellos


Well, I lost a bet.  The result being slow cooker pulled pork. I wanted to share the recipe even though it is not MY favorite recipe, because everyone else loves it so much.  My new favorite sandwich (vegan and made with the same BBQ sauce) is at the bottom.  As soon as I lost the bet this was the very first request, that should give you a hint about how good it is! It's also super easy like most everything I make.  :-)

Ingredients:
3Lbs Pork.  (I've used loin, very lean and tender and shoulder, which is much cheaper)
1 Yellow onion
1C BBQ sauce (recipe follows)
1 bottle of beer

Method:
1. Sear the pork in a very hot skillet on all sides. This should only take a couple of minutes.
2. Slice the onion and layer it on the bottom of the slow cooker.  Put the seared pork on top of the onions.  Pork the beer over the pork, then top with BBQ sauce.
3.  Cook on low 6-8 hours in the slow cooker. Cool and pull!

BBQ Sauce Recipe:
Adapted from Moria, who adapted it from a magazine..we're not sure which one.  :-D


Ingredients:
2 Shallots, minced
1/2 C Ketchup
1/3C worcestershire sauce (Annies is Vegan)
1/3C apple cider vinegar
1 Tbs dijon mustard
1Tbs Garlic Powder
1/2 tsp paprika
1/4 cup molasses
1/4tsp cayenne pepper
Pinch Salt and Pepper

Method
1. Saute shallots over medium heat until translucent.
2. Add all other ingredients and simmer gently for a couple of minutes (about 5)
3.  Blend with an immersion blender (or in a standard blender) until smooth.
4. Enjoy! ;-)


I LOVED the BBQ sauce but I'm not a big fan of the pulled pork (really meat in general) so I decided to make something vegan with the BBQ sauce.  It turned into "The Best Sammich EVAR".  

To make it I marinated a portobello mushroom with 1/4C of the BBQ sauce thinned with 1/4C water for about 15 minutes.  I cooked the mushroom over medium-high heat in a grill pan until it was browned and cooked through.  I sliced it and layered it with more of the BBQ sauce, baby spinach and sliced red onions on a sour roll.  If you know (or are!) a "mushroom hater" you should definitely try out BBQ portobellos.  They turned out so savory and filling.  I want another sammich now.... 

*tummy rumblings*


Sunday, June 26, 2011

Pita Chips from Homemade Pitas

I've recently come to realize how incredibly out of shape I've gotten.  Something about the winter makes me hate exercise.  I think it is because it is always raining and dark when I get home from work during the winter, making jogging outside a pain.  Also, I hate treadmills and have an aversion towards working out in a gym in front of other people.  Clearly I need to work on these phobias in the future, but luckily it is summer now so I can jog outside again. Huzzah!  :-)

In an effort to get healthier I've made a midyear resolution to not eat any more "junk" food....unless I make it myself ;-).  This way if I really have a craving I can still have treats, but without all the extra salt/preservatives/high fructose corn syrup.  I'm a firm believer that there is no such thing as homemade "junk" food. If it's made with love, how could it be junk!? Well, we'll see how long this resolution lasts, but I'm having fun so far. 

Pita chips have been a weakness of mine ever since I started snacking on them during my lab meetings.  Salty and crispy and perfect to dip in hummus.  Luckily it turns out they are super simple to make at home and even better than the ones in the bag.  I love that I can flavor them however I want when I make them at home.   Spicy AND garlicky?  Yes please!

Perhaps I should make a "you too can bake bread!" series.  This recipe would certainly been in it.  The pitas by themselves are easy and super delicious.

For the pitas, adapted from Good Eats n Sweet Treats

Ingredients
Makes 8 pitas

3 cups all purpose flour
1 1/2 teaspoons salt
1 Tablespoon sugar
1 packet instant dry yeast
1 1/2 cups warm water

Method

Sift together the flour, salt, sugar and yeast.  Make a little well in the middle and add the warm water. You are supposed to add 2 tablespoons of oil at this point, but I totally forgot and the pitas still turned out amazing, so I'll continue to leave it out in the future.

With a wooden spoon stir the water into the flour until it forms a ball.  If it is too dry (not all the flour is incorporated) add more warm water 1 tablespoon at a time.  If it is too wet (you can't knead it without it sticking to everything) add more flour, 1 tablespoon at a time.

Knead the dough for 10 minutes.  I kneaded it by hand, you could probably also use a stand mixer.

Place the ball of dough in a clean, oiled bowl.  Cover and let rise until doubled in size--this should take between 1 and 2 hrs. Punch down the dough and divide into eight equal (or if you are me kind of similarly sized) pieces. Roll each piece into a ball, then let the balls sit, covered, for 20 minutes.

While the dough is resting place a cookie sheet in the oven and preheat the oven to 450F.  Take each of the balls and stretch by hand until they are about 1/4" thick and 6' in diameter.  You know, pita shaped!! =]  Throw them (so you don't burn yourself!) two at a time onto the hot sheet.  Bake for 3-5 minutes until golden brown.  Pull the done ones out with a set of tongs and throw the next batch in.

Cool and enjoy!

For the pita chips

Ingredients

Pitas, homemade or store bought
Olive oil
Salt
Spices--black pepper, cayenne pepper, garlic salt, or any other combination

Method

Preheat oven to 350F.

Massage the whole pitas with olive oil, just enough so that the spices will stick on the outside.  Sprinkle with spices.  I used sea salt, cayenne and garlic powder.  I didn't measure, I just sprinkled.

Cut the seasoned pitas into chip sized pieces. Bake for 15 minutes on a cookie sheet, stirring once, until the chips are very crispy and browned.

Cool a bit and enjoy.  :-)  They are GREAT with fresh hummus or salsa.  ooooh, or guacamole!


Miz Helen’s Country Cottage

Wednesday, June 22, 2011

Mom's tomato sauce with CSA veggies

This week I received heirloom tomatoes, sweet peppers and basil in my organic CSA veggie box.  These all happen to be ingredients in this awesome tomato sauce my mom makes.  But Karla, why would you use beautiful fresh tomatoes in a sauce instead of enjoying them raw? Well, honestly, I don't really like raw tomatoes and I'm sure I'll be getting a TON this summer. :-)

Also, this sauce is amazing.  I'm just sayin'.  Like most everything I make it is super easy.  It also manages to taste both super fresh (from the fresh tomatoes, peppers, and basil) and rich (from the tomato sauce and paste) at the same time.

This time I served it over some frozen homemade vegan gnocchi from VeganYumYum and froze some of the sauce for use in the future.  I did NOT use the optional ground beef in my sauce.  :-)


The recipe...quoted from mom :-D

Ingredients
1 lb. ground beef (optional)
1 chopped onion
1 chopped green bell pepper
1 clove minced garlic
1 can tomato paste
3 8-oz. cans tomato sauce
1 quart fresh, diced tomatoes
1 teaspoon chopped oregano
1 tablespoon chopped parsley or other herbs
Salt & pepper to taste


Method
Saute beef (if using), onion, bell pepper, and garlic until beef is browned or onion is transparent.  Add remaining ingredients and cook over low heat for 2 to 3 hours.

Of course, I never measure, so these amounts are very approximate.  Add more garlic, herbs, etc. to your own preference.  Good luck!

Edit: some gnocchi tips! 
First, yes, you can make gnocchi!  It's really not hard at all (especially if you only care about how it TASTES and not how it LOOKS.  :-D

1.) Don't use an electric mixer to mash the potatoes.  Most sites I've read suggested a ricer or potato masher.  I have neither, so I just used two forks to gently break up the spuds, much like making pastry dough.

2.) Use bread flour if you can.  It's OK with all purpose, but bread flour has extra gluten that really firms it up.  There are TONS of recipes for GF gnocchi out there, but I haven't tried them.

3.)  Salt the water you boil the gnocchi in, not the gnocchi!  This will flavor the pasta without messing up the texture.   You want the water fairly salty.  "Like the sea" ---according to Anne Burrell on the food network ;-). 

4.) Using a fork to make patterns on the gnocchi makes it prettier, and perhaps soak up more sauce..but I just roll it into a rope and cut it.  It takes way less time so I am much more likely to make the gnocchi myself.

5.)  I like to boil the gnocchi until they are slightly underdone (a couple of minutes), then strain well and saute in a medium hot skillet using some olive oil or butter.  This gives the gnocchi a really crisp delicious outer shell.  You can also flavor the gnocchi really well with salt, herbs and spices while you saute.

6.) Since making gnocchi is more of a "weekend" task, make a ton and freeze individual portions.  It freezes awesome and then you have a super easy weeknight meal ready to go.  That's what I did for this post.  (Freeze before you boil)


Thursday, June 9, 2011

Skillet Cornbread


I haven't been very inspired to cook much recently, so this recipe is from when I made my mom's baked beans. I've been living off of roasted veggies and take-out. Sometimes I just get into a funk. I NEED to start eating better/healthier though as I keep feeling super sluggish! How do you get out of cooking funks?

This cornbread isn't the absolute best cornbread I've ever eaten, but it is super easy, fast, vegan, made from pantry staples and still freakin' delicious. Also, it is a sweet cornbread. If you omit the honey and add some savory spices and jalapenos I'm sure it would be delicious as well.

Best of all? It only messes up two bowls and a non-stick skillet (which you can just wipe out). Awesome for us lazies I tell you, awesome!

I based my recipe on Peggy's skillet cornbread recipe found here.

PS.  I just found her blog and I LOVE it.  Check it out.  

First you mix wet and dry, separately.  
Then, mix them together and pour into a pre-heated skillet.  

Bake for a short bit (15 min). 
And enjoy!


print recipe
Skillet Cornbread
An easy vegan cornbread. Sweet style.
Ingredients
  • 1C Cornmeal
  • 1/2C Whole wheat pastry flour
  • 1tsp Salt
  • 1tsp Baking powder
  • 1tsp Baking soda
  • 1C Soy milk
  • 1Tbs Lemon Juice
  • 1/4C Applesauce
  • 2Tbs Honey
  • 2Tbs Vegan butter, melted
Instructions
1. Preheat oven to 400F and heat a 9" nonstick (or greased conventional) skillet. 2. Mix soy milk and lemon juice in a small mixing bowl, set aside. 3. Sift together corn meal, flour, baking power, baking soda, and salt in a medium bowl. Set aside.
4. Whisk applesauce, honey and melted vegan butter into the soy milk mixture.
5. Make a well in the dry ingredient, add the wet ingredients to the center and mix until combined. 6. Carefully remove the heating skilled from the oven and pour in the batter. 7. Bake for 15 minutes. Cool and enjoy served with vegan butter and honey!
Details
Prep time: Cook time: Total time: Yield: 8 slices

Sunday, June 5, 2011

Mom's Baked Beans

My mom's baked beans are incredible.  She made a big pot of them one of the last times I was back home in Wisconsin.  After eating about half of a pot I finally asked for the recipe.   She emailed me this really hilarious "recipe" with lots of approximations.  I don't know how she makes them taste so good each time.  I haven't been able to entirely replicate the taste, but my version is darn close and still delicious.   

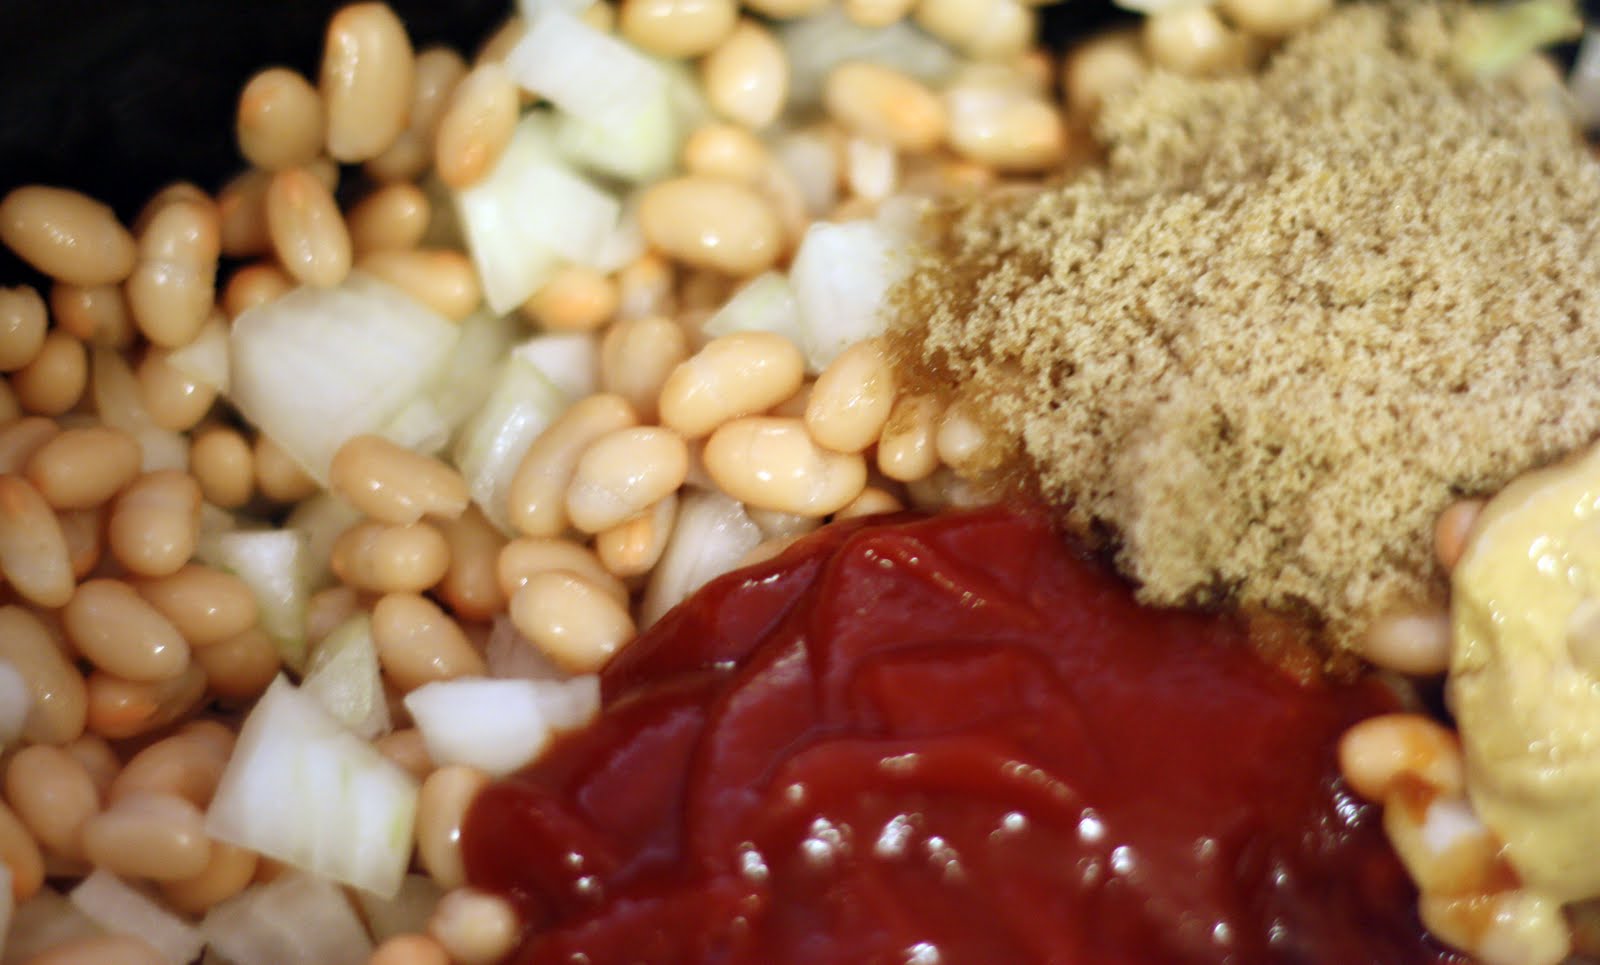
First, mix beans, ketchup, mustard, molasses, onion and brown sugar your slow cooker.   You can use either canned beans or cooked dried beans.  I find cooking my own beans tastes a bit..fresher..BUT it is extra time.  I've used both successfully. 
Turn the slow cooker on low and cook for 4-8 hours (it depends on the volume of your slow cooker vs the volume of the beans you use).  Bigger cooker with less beans = 4 hours, bigger with tons of beans = 8hrs.  These beans are halfway done.  The sauce is looking "saucier" but not quite dark enough in color yet.  


Take em out and enjoy!  I served them with some vegan corn bread and some oven roasted brussel sprouts. 
PS. Mom uses about four pieces of sliced uncooked bacon in her beans.  If you choose to use them add them right at the beginning. 


print recipe
Mom's baked beans
Vegan baked beans inspired by my mother.
Ingredients
  • 4C White beans, cooked
  • 3/4C Ketchup
  • 1T Mustard
  • 1/4C Brown Sugar
  • 1/4C Molasses
  • 1 small Yellow onion
  • to taste Hot sauce
Instructions
1. Dice onion. Mix all ingredients in a slow cooker. 2. Cook on "Low" for 4-6hrs. 3. Enjoy!
Details
Prep time: Cook time: Total time: Yield: 8 servings

Sunday, May 8, 2011

Simplest Tomato Sauce

This post is for all of my friends who think that they can't cook because it is a.) too hard or b.) too time consuming.  This tomato sauce recipe results in a sauce that could be served in a restaurant, but it takes no prep time and absolutely no skill!! :-)

I originally found the recipe at Smitten Kitchen, but it has been circulating the web for some time. 

First, get your ingredients: canned tomatoes (the best you can afford, as they make up the taste), a medium yellow onion and butter or vegan margarine--I've used both with great success.

Then, put them in a pot! Simmer for 45 minutes.  You can either pay attention and smash the tomatoes up as you go, or forget about the pot and smash them all up at the end.  Again, I've done it both ways. :-)

Finally, taste and salt, if needed--the butter and tomatoes are often salted, so be careful not to over-salt.   The sauce is then ready to serve.  I've served it with spaghetti and over steamed or roasted vegetables, however, my favorite use was over pan fried polenta.


print recipe

Simplest Tomato Sauce
The easiest tomato sauce recipe around.
Ingredients
  • 1 28oz Can Whole Peeled Tomatoes (San Marzano)
  • 1 Medium Yellow Onion
  • 5Tbs Butter or Vegan Butter
Instructions
1. Peel the onion and cut it in half. 2. In a medium pot simmer tomatoes, butter, and halved onion over medium-low heat for 45 minutes, stirring occasionally while gently smashing tomatoes. 3. Taste and add salt and pepper to taste. Smash to desired consistency and serve immediately.
Details
Prep time: Cook time: Total time: Yield: 4

Sunday, April 17, 2011

Beer Bread!

This bread is so good that I no longer buy bread, ever.  It is also well-liked by all and one of my most requested recipes. If you love bread but have been afraid to try baking it at home, I urge you to give this recipe a try.

Commercial bread making ovens rely on steam injectors to develop a nice chewy crust.  This recipe manages to achieve the same result by trapping the steam from a somewhat wet dough by using a lidded dutch oven for baking.  The vinegar gives the bread a nice sour touch and the flavor of the bread is greatly influenced by the flavor of the beer used.  I find that a wheat beer or stout give the best flavor.  In this case I used a very hoppy beer that was given to me by a super awesome lab-mate.  The bread tasted really, really hoppy.  I personally loved this flavor, but it might surprise someone expecting a "normal" bread flavor.  If you are not a big fan of beer, a Guinness or a Heff will give awesome flavor without seeming "beer-y".   

Beer Bread. 
Adapted from Nine Bean-rows.


Ingredients:
3 Cups Bread Flour (the highest rated on cooks illustrated is King Arthur)
1 Packet Dry Yeast (I used active dry)
1 tbs Salt
2/3 Cup Warm Water
2/3 Cup Beer
1Tbs vinegar (white, white wine, apple cider, or rice)

Method:
1. Mix together dry ingredients, either in a stand mixer or with a whisk.  Add the warm water to the beer and sprinkle over the dry ingredients.  Add the vinegar and mix (with the bread hook or a wooden spoon) until combined. 
2. Place combined dough in a greased bowl, cover with plastic wrap or a damp towel and let rise 12-24 hrs.  It should rise in a place that is average to warm room temp (65+).  Because it is so cold in my condo that includes turning on the space heater, hopefully this isn't true for you!  It should look airy and slightly wet after rising and should be at least double in size.
3. Lightly flour a piece of parchment paper (not waxed paper, tried that once, no go) and knead the bread around on it until it is easy to shape into a ball.  You may need to add additional flour.  All together this should not take more than a minute or two.  Once shaped into a ball let the bread rise (in a bowl, on the parchment paper) for an additional 2 hours until doubled in size.  This time it should resemble an uncooked loaf.
4. Pre-heat oven to 500F with your cooking pan inside.  This should either be a dutch oven or a large heavy pot that has a lid.  After 30 minutes reduce oven temperature to 425F and add bread (on parchment paper) directly to the pot.  Cover with the lid and bake for 30 minutes.

5.  Remove the lid and bake an additional 10 to 15 minutes until the crust is nice and brown.


If you enjoy the bread there is an entire movement based on this strategy of bread making.  I urge you to try other recipes and let me know how they are!!  There is even a cookbook.  A cookbook that I would love, by the way ;-) ;-)

Monday, April 11, 2011

Barley Vegetable Stew

I am not a vegan. I am not even a vegetarian. (Although I am working hard towards becoming vegan!). Recipes like this healthy vegan stew are certainly helping. It is hearty, savory, and full of flavor while remaining vegan, low in fat, and chock full of veggies.  I really enjoy the challenge of cooking healthy food that people love without resorting to my go-to delicious-making ingredients of bacon, butter..blue cheese....Italian sausage....(the list goes on).

Oh, did I mention the stew is also incredibly easy to prepare? If you can chop vegetables you have all the skills you need.  No good at chopping veggies?  That's probably OK too, just call the stew "rustic". ;-) ;-)


Pros: Fast, Easy, REALLY GOOD, Healthy
Cons: Erm..no meat?  (Says Mr. C)
Active Time: 10-15 minutes (how fast can you chop?)
Ready in: 45 minutes
Served: 2x people 2x meals. (4 big servings)

Vegan Barley Vegetable Stew


Ingredients:
Olive oil (to coat pan)
1 medium onion, chopped
2 cloves garlic, minced
6 baby carrots (or 2 small carrots), diced
1 leek, white and light green parts only, chopped
6-8 fingerling potatoes (or 1-2 Yukon golds, or red skinned potatoes), diced
.5lbs firm white mushrooms, diced
1tsp red pepper flakes
1 cup pearl barley
1 (15oz) can of tomato sauce (low sodium preferred)
6-8 cups of broth or water depending on how thick you prefer your stew.  8c would be more "soup" like. (I used 6c of water + 1 TBS of "no-chicken" better than bouillon)
2 bay leaves
Salt and pepper to taste.

Add-ins: For vegans: fresh basil, parsley or thyme.  For vegetarians: a Parmesan rind added with the broth, or grated on top. For carnivores: slices of precooked chicken or pork sausage, added with water.  I didn't use any extras for this particular recipe.

Method:
1. Heat oil in a large soup pot over medium heat.  Once shimmering add all of the chopped veggies and red pepper flakes. Cook on medium heat, stirring occasionally, until the veggies are slightly caramelized and beginning to soften--about 5-10 minutes depending on the size of the pot and heat of the stove.

2. Add the barley and stir to coat until all of the barley are coated with the oil and shiny.

3. Add tomato sauce, stock, bay leaves and increase heat to high. Once boiling, cover, reduce heat, and simmer for 30 minutes (or until the barley is nice and tender).  Remove bay leaves and add salt and pepper to taste.

Enjoy!

When making this recipe I simply used whatever veggies I had in my fridge at the time.  You can certainly adjust the vegetables to your taste, just keep the general quantity the same. The garlic, onions, and potatoes really add a lot to the dish, so I would keep those constant ;-).

Barley on FoodistaBarley
Related Posts Plugin for WordPress, Blogger...