Wednesday, June 29, 2011

Lemon Barley Stew

I almost didn't post this recipe.  It's one of those "throw together whatever I had on hand" recipes.  But, I've been told this is when I am my best in the kitchen.  I also devoured this entire pot in a day and a half, it was that delicious!  Because I wasn't planning on posting it the picture is just from the iPhone.  It isn't particularly pretty anyways, but if you are craving a summery soup that is vegan and healthy you must try it!


print recipe

Lemon Barley Stew
Easy, delicious summery stew. Vegan!
Ingredients
  • 4C Vegetable Broth
  • 1, halved Lemon
  • 1 small Onion, diced
  • 2 Yukon gold Potato, diced
  • 2 cloves Garlic, minced
  • 1 large cap Portobello Mushroom, diced
  • 1/2C Pearl Barley
  • 2Tbs Baby Spinach
  • to taste Salt and Pepper
Instructions
1. Bring veggie broth and lemon halves to a boil. Boil for 15 minutes. You'll want to try to use an organic lemon here, if possible, as you are putting the entire thing in the broth. I also squeeze the juice of the lemon into the stock before throwing it in. 2. Strain stock into a bowl and save. 3. To the same pot, add a bit of olive oil, or butter and saute the onion and potatoes until the onions are slightly caramelized and translucent. 4. Add the Portobello, barley and garlic to the pot along with a bit of salt and pepper to taste. Continue sauteing the mixture until the Portobello bits begin to brown. 5. Add the veggie broth back into the pot, bring to a boil, and simmer until the potatoes are tender. 6. Mix in the spinach until it is wilted. Serve!
Details
Prep time: Cook time: Total time: Yield: 4 servings

Tuesday, June 28, 2011

What I ate Wednesday and jogging!

What I ate Wednesday (WIAW) is a fun group event over at Peas and Crayons.  ( I adore that blog, by the way).  Basically, every Wednesday a bunch of people take pics of all the food they eat in one day and share with other bloggers.  Its fascinating seeing what so many different people will eat in one day.  Hundreds of people link their stuff!. There is so much variety.  I get lots of new ideas for lunches/snacks.  A couple of my favorite blogs participate, so I figured...why not!  It'll be interesting to see what I eat in one day anyways, I never really keep track.

So here's what I ate one day last week!

A double tall iced soy vanilla latte from Starbucks for breakfast. Yes, I am an addict.  Please don't judge.
 For lunch I had some delicious lemon barley stew (recipe after!). EDIT: recipe up now!

Snack of diet coke and honey roasted almonds.


Dinner was Mom's tomato sauce on whole wheat spaghetti (spaghetti not pictured).
and a snack of homemade Baklava
Annnnd that about does it!

I'm going to supplement my "What I ate Wednesday" with "What I jogged this week" just to keep me honest.

Jogging 6/22/11-6/28/11
6/22- 2.65mi @11:37/mi (feeling very sore, had to walk a bunch)
6/24-1.35mi "speedy" workout @8:43/mi (still feeling ouchie)
6/26-2.65mi @9:45/mi
6/27-1.35mi @9:14/mi
Total last week= 8mi.
Goals for next week are 10mi total, a speedy workout of 8:30/mi and a long work out of over 3 mi.

Recipe later today!  Thanks for reading.  :-D


Monday, June 27, 2011

Daring Bakers: Phyllo Dough and Baklava


Erica of Erica’s Edibles was our host for the Daring Baker’s June challenge. Erica challenged us to be truly DARING by making homemade phyllo dough and then to use that homemade dough to make Baklava.

For this challenge I went a bit non-traditional as I'm not a big fan of walnuts.  The basic recipe is found here, from Alton Brown (one of my favorites!!).   I changed it quite a bit and used almonds, cherries and cashews for the filling.  For the syrup I used honey, water, and sugar and flavored it with lemon, cayenne, cinnamon and allspice.  I absolutely loved the flavor of the filling, slightly nutty, lots of cherry and a pinch of spice.


I enjoy these daring bakers challenges because they challenge me to be creative and to try recipes I would never try otherwise.   For instance, baklava is too rich to be a favorite of mine, but I did enjoy spending hours making the dough and coming up with a filling flavor.  If you have any desire to try making Baklava I'd encourage you to take a weekend and do it.  I can help give pointers, if you'd like. :-)


Unbaked
Fresh outta the oven!

Sunday, June 26, 2011

Pita Chips from Homemade Pitas

I've recently come to realize how incredibly out of shape I've gotten.  Something about the winter makes me hate exercise.  I think it is because it is always raining and dark when I get home from work during the winter, making jogging outside a pain.  Also, I hate treadmills and have an aversion towards working out in a gym in front of other people.  Clearly I need to work on these phobias in the future, but luckily it is summer now so I can jog outside again. Huzzah!  :-)

In an effort to get healthier I've made a midyear resolution to not eat any more "junk" food....unless I make it myself ;-).  This way if I really have a craving I can still have treats, but without all the extra salt/preservatives/high fructose corn syrup.  I'm a firm believer that there is no such thing as homemade "junk" food. If it's made with love, how could it be junk!? Well, we'll see how long this resolution lasts, but I'm having fun so far. 

Pita chips have been a weakness of mine ever since I started snacking on them during my lab meetings.  Salty and crispy and perfect to dip in hummus.  Luckily it turns out they are super simple to make at home and even better than the ones in the bag.  I love that I can flavor them however I want when I make them at home.   Spicy AND garlicky?  Yes please!

Perhaps I should make a "you too can bake bread!" series.  This recipe would certainly been in it.  The pitas by themselves are easy and super delicious.

For the pitas, adapted from Good Eats n Sweet Treats

Ingredients
Makes 8 pitas

3 cups all purpose flour
1 1/2 teaspoons salt
1 Tablespoon sugar
1 packet instant dry yeast
1 1/2 cups warm water

Method

Sift together the flour, salt, sugar and yeast.  Make a little well in the middle and add the warm water. You are supposed to add 2 tablespoons of oil at this point, but I totally forgot and the pitas still turned out amazing, so I'll continue to leave it out in the future.

With a wooden spoon stir the water into the flour until it forms a ball.  If it is too dry (not all the flour is incorporated) add more warm water 1 tablespoon at a time.  If it is too wet (you can't knead it without it sticking to everything) add more flour, 1 tablespoon at a time.

Knead the dough for 10 minutes.  I kneaded it by hand, you could probably also use a stand mixer.

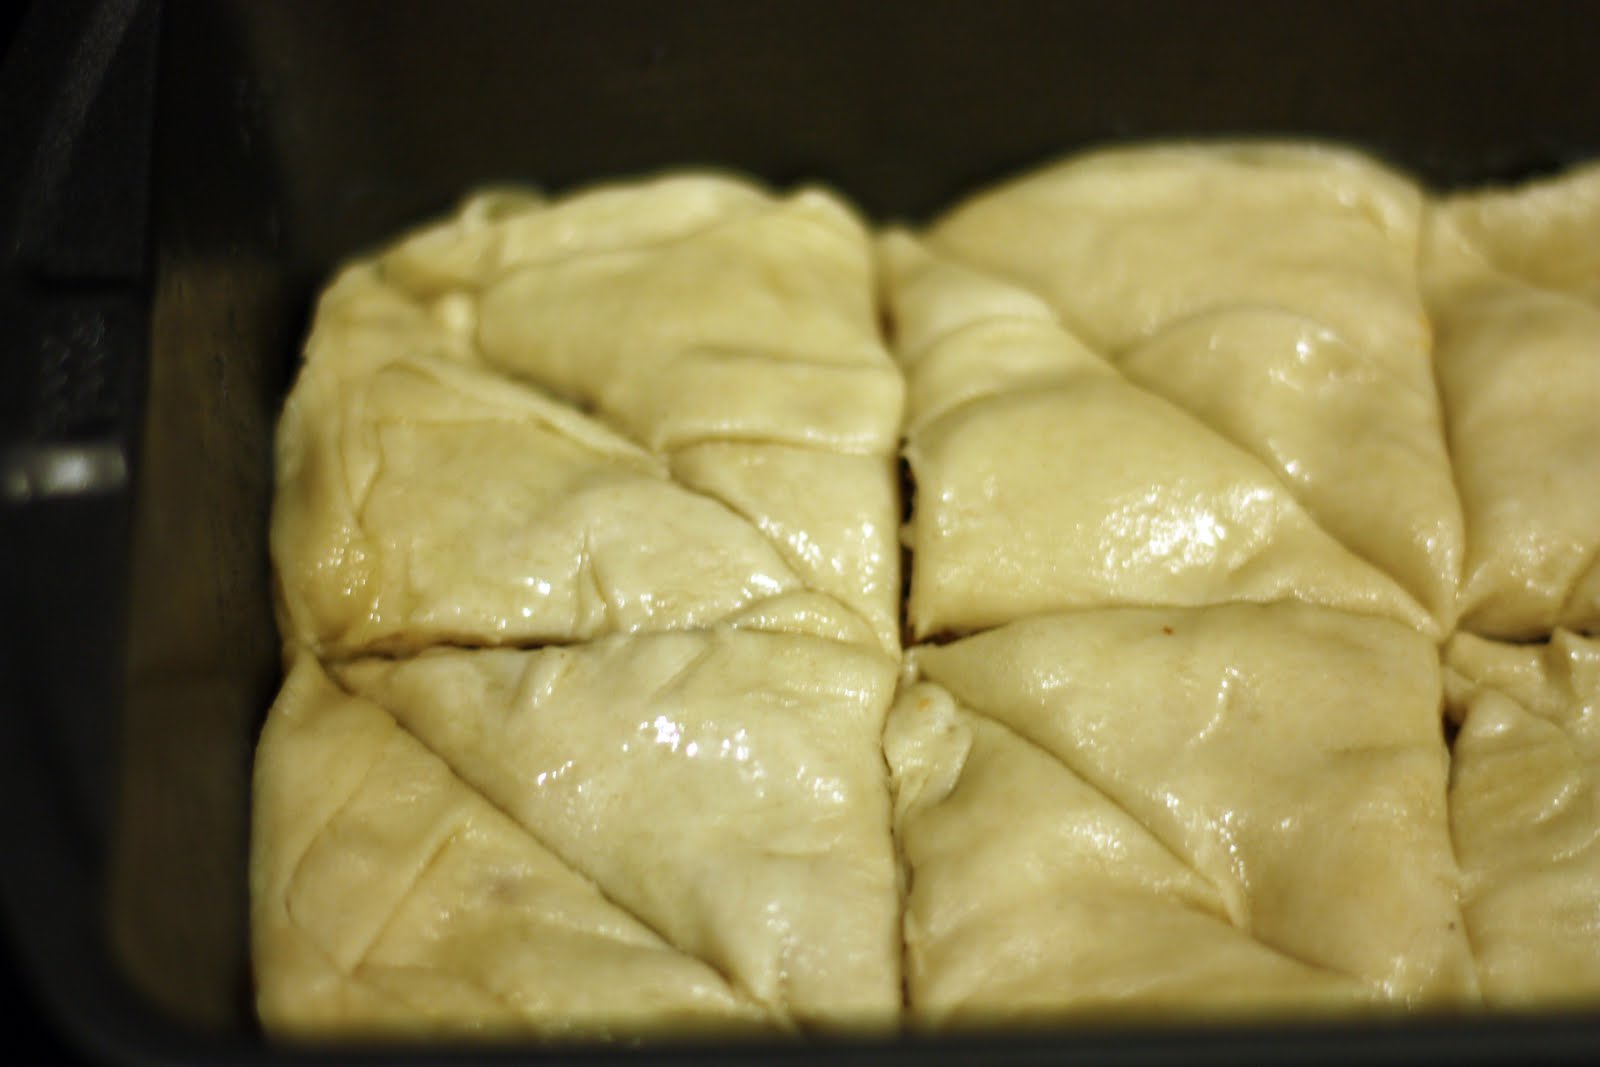
Place the ball of dough in a clean, oiled bowl.  Cover and let rise until doubled in size--this should take between 1 and 2 hrs. Punch down the dough and divide into eight equal (or if you are me kind of similarly sized) pieces. Roll each piece into a ball, then let the balls sit, covered, for 20 minutes.

While the dough is resting place a cookie sheet in the oven and preheat the oven to 450F.  Take each of the balls and stretch by hand until they are about 1/4" thick and 6' in diameter.  You know, pita shaped!! =]  Throw them (so you don't burn yourself!) two at a time onto the hot sheet.  Bake for 3-5 minutes until golden brown.  Pull the done ones out with a set of tongs and throw the next batch in.

Cool and enjoy!

For the pita chips

Ingredients

Pitas, homemade or store bought
Olive oil
Salt
Spices--black pepper, cayenne pepper, garlic salt, or any other combination

Method

Preheat oven to 350F.

Massage the whole pitas with olive oil, just enough so that the spices will stick on the outside.  Sprinkle with spices.  I used sea salt, cayenne and garlic powder.  I didn't measure, I just sprinkled.

Cut the seasoned pitas into chip sized pieces. Bake for 15 minutes on a cookie sheet, stirring once, until the chips are very crispy and browned.

Cool a bit and enjoy.  :-)  They are GREAT with fresh hummus or salsa.  ooooh, or guacamole!


Miz Helen’s Country Cottage

Wednesday, June 22, 2011

Mom's tomato sauce with CSA veggies

This week I received heirloom tomatoes, sweet peppers and basil in my organic CSA veggie box.  These all happen to be ingredients in this awesome tomato sauce my mom makes.  But Karla, why would you use beautiful fresh tomatoes in a sauce instead of enjoying them raw? Well, honestly, I don't really like raw tomatoes and I'm sure I'll be getting a TON this summer. :-)

Also, this sauce is amazing.  I'm just sayin'.  Like most everything I make it is super easy.  It also manages to taste both super fresh (from the fresh tomatoes, peppers, and basil) and rich (from the tomato sauce and paste) at the same time.

This time I served it over some frozen homemade vegan gnocchi from VeganYumYum and froze some of the sauce for use in the future.  I did NOT use the optional ground beef in my sauce.  :-)


The recipe...quoted from mom :-D

Ingredients
1 lb. ground beef (optional)
1 chopped onion
1 chopped green bell pepper
1 clove minced garlic
1 can tomato paste
3 8-oz. cans tomato sauce
1 quart fresh, diced tomatoes
1 teaspoon chopped oregano
1 tablespoon chopped parsley or other herbs
Salt & pepper to taste


Method
Saute beef (if using), onion, bell pepper, and garlic until beef is browned or onion is transparent.  Add remaining ingredients and cook over low heat for 2 to 3 hours.

Of course, I never measure, so these amounts are very approximate.  Add more garlic, herbs, etc. to your own preference.  Good luck!

Edit: some gnocchi tips! 
First, yes, you can make gnocchi!  It's really not hard at all (especially if you only care about how it TASTES and not how it LOOKS.  :-D

1.) Don't use an electric mixer to mash the potatoes.  Most sites I've read suggested a ricer or potato masher.  I have neither, so I just used two forks to gently break up the spuds, much like making pastry dough.

2.) Use bread flour if you can.  It's OK with all purpose, but bread flour has extra gluten that really firms it up.  There are TONS of recipes for GF gnocchi out there, but I haven't tried them.

3.)  Salt the water you boil the gnocchi in, not the gnocchi!  This will flavor the pasta without messing up the texture.   You want the water fairly salty.  "Like the sea" ---according to Anne Burrell on the food network ;-). 

4.) Using a fork to make patterns on the gnocchi makes it prettier, and perhaps soak up more sauce..but I just roll it into a rope and cut it.  It takes way less time so I am much more likely to make the gnocchi myself.

5.)  I like to boil the gnocchi until they are slightly underdone (a couple of minutes), then strain well and saute in a medium hot skillet using some olive oil or butter.  This gives the gnocchi a really crisp delicious outer shell.  You can also flavor the gnocchi really well with salt, herbs and spices while you saute.

6.) Since making gnocchi is more of a "weekend" task, make a ton and freeze individual portions.  It freezes awesome and then you have a super easy weeknight meal ready to go.  That's what I did for this post.  (Freeze before you boil)


Monday, June 20, 2011

Carter Beats the Devil


My favorite cocktail of all time.  I had to make it at home.  If you get the chance, however, go to Flora in Oakland and try the real deal.  Amazing!

Basically, it is just a spicy margarita.  But it is so much more.  I don't know how, but it goes beyond margarita to something really, really special and fancy tasting.

The first thing you need to do to make this cocktail is fill a jar with dried hot peppers, then cover the peppers with high proof rum (151).  Let the jar sit for at least 2 weeks, then strain it. The 151 will now be SMOKING hot.  Mmmmm. 
Then, mix (over ice)

-3oz tequila reposado
-1oz lime juice
-1tbs agave necter
-1tsp chili infusion (or to taste...start with VERY little)

Mix well.  Strain out the ice (easy if you have a cocktail shaker..) and serve cold. It is especially nice after a run.  I'm just sayin'.  :-D

It was super sunny out so I took a picture in the sun, just because sun makes me happy. 

Wednesday, June 15, 2011

Healthy Asian Inspired Potato Salad (with Tofu Croutons!)


This month was my first month participating in the "Daring cooks" challenge.  This month we were challenged to create a healthy potato salad from around the world.  I loved this challenge because although it wasn't "difficult", it forced me to be creative.  

Jami Sorrento was our June Daring Cooks hostess and she chose to challenge us to celebrate the humble spud by making a delicious and healthy potato salad. The Daring Cooks Potato Salad Challenge was sponsored by the nice people at the United States Potato Board, who awarded prizes to the top 3 most creative and healthy potato salads. A medium-size (5.3 ounce) potato has 110 calories, no fat, no cholesterol, no sodium and includes nearly half your daily value of vitamin C and has more potassium than a banana! 

For this challenge I decided that I needed to get rid of the traditional "creamy" dressing that I associate with most potato salads.  I also wanted to include the skins for extra goodness and include something that would add some protein. 

Maybe because it has "salad" in the title, or maybe because I've been really wanting to enjoy tofu, I decided to make crispy tofu croutons to add protein to my potato salad.   I marinated the tofu in an asian inspired sauce and then used that sauce to top the salad (instead of using a mayo based sauce).  I used a low sodium tamari to try to cut down on the sodium.  
I loved the varying textures and flavors in this salad.  The bell pepper was really fresh, the tofu was crispy and savory and the potatoes were creamy.  The marinade dressing also added a really zingy fresh touch.  Overall, I really enjoyed the "salad" as a whole. :-) 


print recipe

Asian Inspired Potato Salad with Tofu Croutons
A healthy, vegan potato salad with Asian flavors and crispy tofu croutons.
Ingredients
  • 1/2 pound Extra firm tofu, pressed
  • 2Tbs Tamari (or soy) sauce
  • 2Tbs Rice wine vinegar
  • 1tsp Hot sauce
  • 1Tbs Sesame oil
  • 2 cloves Garlic, mashed
  • 1/4tsp Ginger powder
  • 1lb Small red potatoes, cubed
  • 1 Bell pepper, diced
  • 1tsp Toasted sesame seeds
Instructions
1. Cut tofu into small (1cm) cubes. Whisk together the tamari, oil, vinegar, garlic, hot sauce and ginger and cover the tofu cubes. Marinate cubes for one hour, stirring once. 2. Preheat the oven to 400F. Remove tofu cubes from the marinade (reserve the marinade!) and pat dry. Bake on a cookie sheet for 20-30 minutes, stirring occasionally, until brown and crispy. Cool the croutons. 3. Boil the cubed potatoes for 10 minutes or until easily pierced with a fork. Drain and cool. 4. Mix cooked potatoes, diced bell peppers and 1/2 of the reserved marinade. Top with tofu croutons and toasted sesame seeds.
Details
Prep time: Cook time: Total time: Yield: 4 side servings


Tuesday, June 14, 2011

Bakesale Betty's Coleslaw.

Bakesale Betty's is an Oakland institution. People line up out the door and around the block every day during lunch to have one of her amazing fried chicken sandwiches.  These sandwiches consist of nothing more than a torpedo roll, spicy fried chicken breast and spicy coleslaw.  But it is enough to keep people coming back again.  and again...and again... I might have been one of those people.  Oh Oakland, I miss you!

The part of the sandwich I loved the best was the spicy slaw that is piled on top.  Turns out google is awesome and there were recipes posted online!  I made the slaw and ate it by itself for a quick light lunch.  It is super simple and uberly delicious. 

All you do is marinate some thinly sliced red onion in red wine vinegar for a couple minutes.  Then, toss together a small sliced cabbage, the onions, a chopped up small bunch of parsley and a minced jalapeno.  Dress it with a simple dressing of red wine vinegar, olive oil (the best you have!), dijon mustard and salt.  Simple.  Summery.  Fresh.  Awesome!  I used the recipe found here, but with about half of the recommended oil.  I don't miss it. 
I'll be posting my own original recipe for this month's "daring cooks" challenge tomorrow!  See you then. Wheeee :-)

Thursday, June 9, 2011

Skillet Cornbread


I haven't been very inspired to cook much recently, so this recipe is from when I made my mom's baked beans. I've been living off of roasted veggies and take-out. Sometimes I just get into a funk. I NEED to start eating better/healthier though as I keep feeling super sluggish! How do you get out of cooking funks?

This cornbread isn't the absolute best cornbread I've ever eaten, but it is super easy, fast, vegan, made from pantry staples and still freakin' delicious. Also, it is a sweet cornbread. If you omit the honey and add some savory spices and jalapenos I'm sure it would be delicious as well.

Best of all? It only messes up two bowls and a non-stick skillet (which you can just wipe out). Awesome for us lazies I tell you, awesome!

I based my recipe on Peggy's skillet cornbread recipe found here.

PS.  I just found her blog and I LOVE it.  Check it out.  

First you mix wet and dry, separately.  
Then, mix them together and pour into a pre-heated skillet.  

Bake for a short bit (15 min). 
And enjoy!


print recipe
Skillet Cornbread
An easy vegan cornbread. Sweet style.
Ingredients
  • 1C Cornmeal
  • 1/2C Whole wheat pastry flour
  • 1tsp Salt
  • 1tsp Baking powder
  • 1tsp Baking soda
  • 1C Soy milk
  • 1Tbs Lemon Juice
  • 1/4C Applesauce
  • 2Tbs Honey
  • 2Tbs Vegan butter, melted
Instructions
1. Preheat oven to 400F and heat a 9" nonstick (or greased conventional) skillet. 2. Mix soy milk and lemon juice in a small mixing bowl, set aside. 3. Sift together corn meal, flour, baking power, baking soda, and salt in a medium bowl. Set aside.
4. Whisk applesauce, honey and melted vegan butter into the soy milk mixture.
5. Make a well in the dry ingredient, add the wet ingredients to the center and mix until combined. 6. Carefully remove the heating skilled from the oven and pour in the batter. 7. Bake for 15 minutes. Cool and enjoy served with vegan butter and honey!
Details
Prep time: Cook time: Total time: Yield: 8 slices

Sunday, June 5, 2011

Mom's Baked Beans

My mom's baked beans are incredible.  She made a big pot of them one of the last times I was back home in Wisconsin.  After eating about half of a pot I finally asked for the recipe.   She emailed me this really hilarious "recipe" with lots of approximations.  I don't know how she makes them taste so good each time.  I haven't been able to entirely replicate the taste, but my version is darn close and still delicious.   

First, mix beans, ketchup, mustard, molasses, onion and brown sugar your slow cooker.   You can use either canned beans or cooked dried beans.  I find cooking my own beans tastes a bit..fresher..BUT it is extra time.  I've used both successfully. 
Turn the slow cooker on low and cook for 4-8 hours (it depends on the volume of your slow cooker vs the volume of the beans you use).  Bigger cooker with less beans = 4 hours, bigger with tons of beans = 8hrs.  These beans are halfway done.  The sauce is looking "saucier" but not quite dark enough in color yet.  


Take em out and enjoy!  I served them with some vegan corn bread and some oven roasted brussel sprouts. 
PS. Mom uses about four pieces of sliced uncooked bacon in her beans.  If you choose to use them add them right at the beginning. 


print recipe
Mom's baked beans
Vegan baked beans inspired by my mother.
Ingredients
  • 4C White beans, cooked
  • 3/4C Ketchup
  • 1T Mustard
  • 1/4C Brown Sugar
  • 1/4C Molasses
  • 1 small Yellow onion
  • to taste Hot sauce
Instructions
1. Dice onion. Mix all ingredients in a slow cooker. 2. Cook on "Low" for 4-6hrs. 3. Enjoy!
Details
Prep time: Cook time: Total time: Yield: 8 servings

Wednesday, June 1, 2011

His & Hers Pretzel Dogs

Some days I just want to cook something that I know Mr. C will love.  He (a meat and cheese lover) puts up with me cooking vegan/vegetarian and generally trying random stuff I've never made before. He is super supportive and gives me good "normal people" feedback as I realize my tastes are fairly different than most.

One of his favorite foods is soft pretzels.  And beer.  And brats. And cheese.  So I figured...why don't I combine them!? The results were really extraordinary.  I made a meaty/cheesy one for him and a vegan version for myself.  My weakness is dipping sauces so I made a vegan spicy aioli to go with mine.
To incorporate the beer, I added some of our home brew (a german heffe) to the pretzel dough in place of some of the water.
I used locally made bratwurts instead of the traditional hot dog in the meat-y version, and vegan hotdogs for mine.  I'm generally not a huge fan of fake meat products because of all the extra stuff they add in, but for this recipe I just couldn't resist.  The one I chose was surprisingly tasty, but I can't remember the brand! Argh! 

For the meat-y version I melted some extra sharp cheddar on top during the last 5 minutes of the baking process to give it some bubble.  Mr. C says "great addition!"
Wrap pretzel dough around dogs.

Boil in baking soda water! Adding baking soda to the water raises the pH of the water (making it more basic). This reaction helps to create the shiny brown crust on outside of the soft pretzel, so don't skip it!  Interestingly, traditional German pretzels are made with lye (pH 13--vs pH 8 for baking soda water), giving an even deeper brown crust.  Baking soda is cheaper and more accessible than lye AND the results are still delicious. :-)
 After boiling, the pretzel on the dogs is more puffed up and yellow than before. 
 Bake and enjoy! 

Real dogs!  Cause I think they are super cute! :-) And, if I'm being honest, I LOVE my new camera.  I really need to RTFM (read the freaking manual) and figure out what all the buttons do. But, even as a total newb it's so much better at shooting in the dark cave that is my condo.  Hurrah!


print recipe

Pretzel Dogs
Vegan (with a non-vegan option) pretzel dogs made with a beer flavored dough. Easy, fun and delicious
Ingredients
  • 1/2C Warm water
  • 1Tbs Brown sugar
  • 2tsp Salt
  • 1C Warm beer
  • 1 packet Active dry yeast
  • 2Tbs Olive oil
  • 4 1/2C Flour (all purpose)
  • 2/3C Baking soda
  • 8 Hot Dogs (or Sausages)
Instructions
1. Combine the water, beer, salt and brown sugar in the bowl of a stand mixer. Add the yeast and let sit for 5 minutes. The yeast should be nice and bubbly at this point. If it isn't your yeast might be dead, start over with fresh yeast! 2. Add the flour and olive oil to the bowl, mix on medium speed until thoroughly combined. My mixer took 3-4 minutes. 3. Shape the dough into a ball and transfer to a clean bowl that can hold double the current volume of the ball and has been lightly coated in olive oil. Cover loosely with a towel or plastic wrap and leave to rise in a warm place for 60 minutes or until doubled in size. 4. Boil a large pot of water and add the baking soda (carefully as it can boil over). And preheat oven to 450F. 5. Separate the dough into 8 pieces (this will make a high pretzel to dog ratio, you can split it to more dogs for a higher meat to pretzel ratio) and roll into a long rope, about 1/2 inch in diameter. Wrap around the dogs pinching tightly on the ends. 6. Working in small batches (1 or 2 dogs) add the dog to the boiling water for 30 seconds each. Remove dogs to a wire rack (or just a sheet) to dry. 7. Brush the boiled dogs lightly with olive oil and if desired sprinkle with salt or other herbs. 8. Bake for 15 minutes until pretzels are a deep golden brown. If desired, after 10 minutes top the pretzels with cheese and continue to bake the final 5 minutes. Cool pretzels and enjoy.
Details
Prep time: Cook time: Total time: Yield: 8 dogs
Related Posts Plugin for WordPress, Blogger...